Power BI Incremental Refresh
How incremental refresh works in Power BI — partitioning, change detection, step-by-step setup, and the license and data source limitations you need to know.
Radek Řezáč
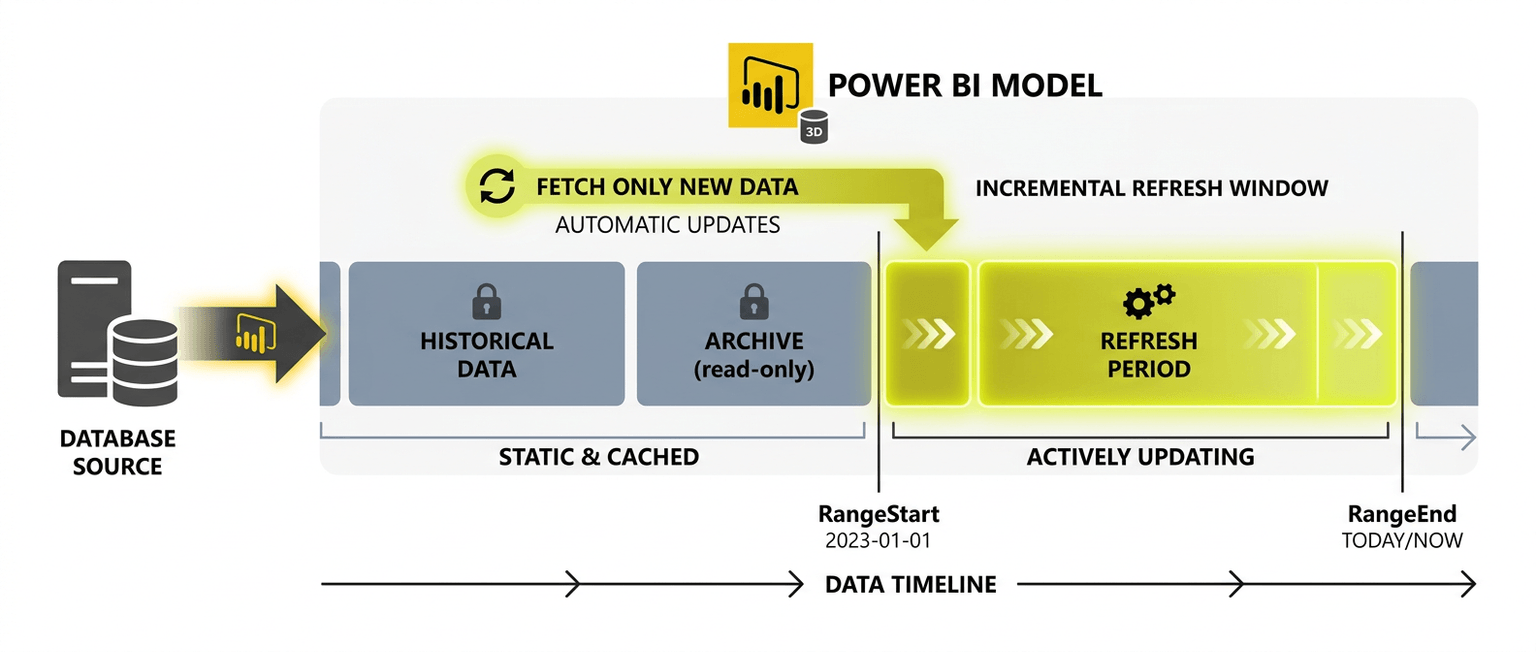
Incremental refresh is one of the most impactful Power BI optimisations for large datasets. Instead of rewriting the entire dataset on every refresh, it updates only the most recent data partitions — dramatically reducing refresh time, resource consumption, and cost.
How Incremental Refresh Works
Three mechanisms make it possible:
- Data Partitioning — the dataset is segmented based on time frames (days, months). Power BI identifies which partitions need updating.
- Change Detection — the system monitors specific fields (e.g., a maximum date value) and only triggers refreshes when new data exists.
- Availability — the feature is available only in Power BI Service, and full functionality typically requires a Power BI Premium license.
Benefits
- Improved Performance — refreshing only recent partitions reduces processing time and resource consumption significantly
- Efficient Data Handling — server and network workload decreases, speeding up report availability
- Cost-Effective — Premium users experience significant compute savings
- Reduced Load Times — current data becomes available faster
- Better Historical Data Management — retain historical subsets while efficiently updating recent data
- Automation — scheduled refreshes run without manual intervention
Setting Up Incremental Refresh: Step by Step
Step 1: Open the Report in Power BI Desktop
Launch the report and select Home → Transform Data to open Power Query Editor.
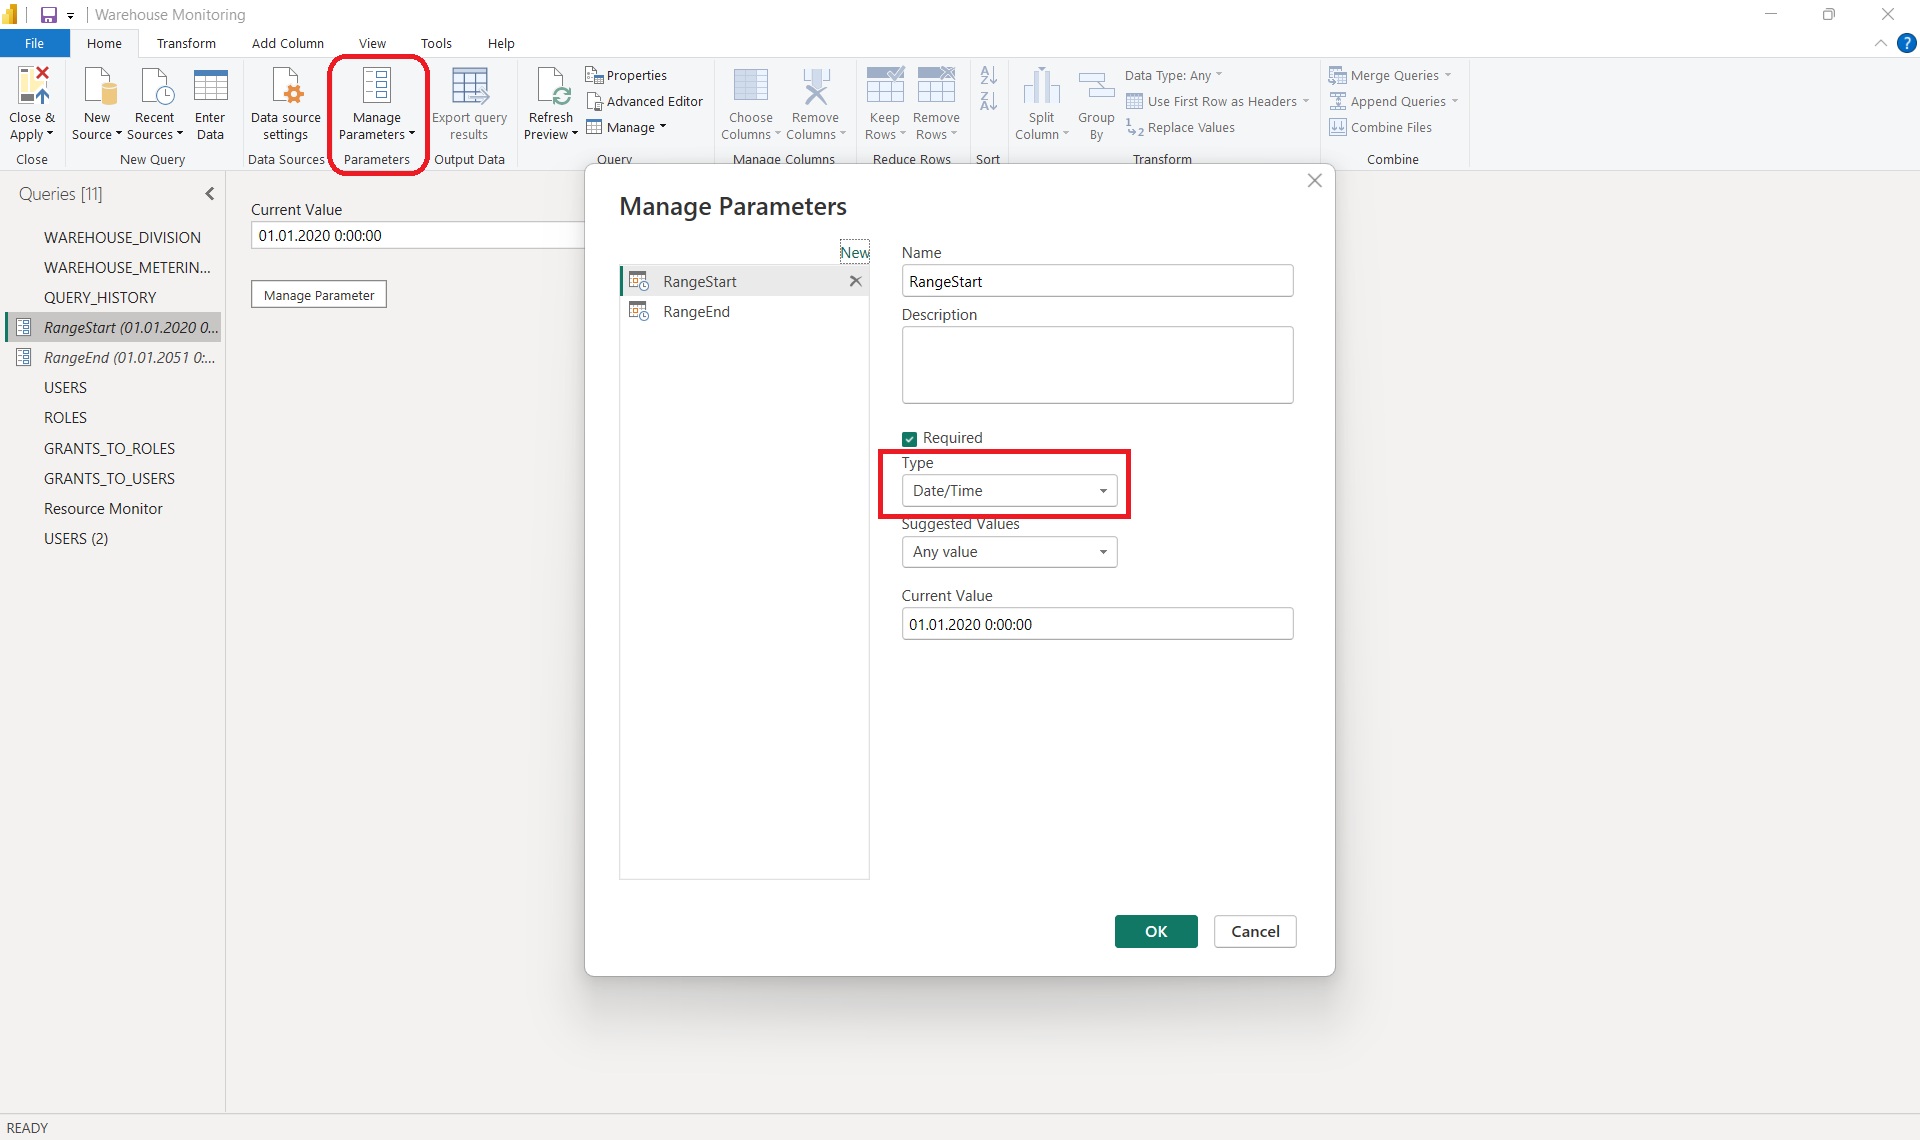
Step 2: Create Range Parameters
In Power Query Editor, go to Manage Parameters → New Parameter and create two parameters:
- RangeStart — Type: Date/Time, Default value:
01.01.2020 0:00:00 - RangeEnd — Type: Date/Time, Default value:
01.01.2021 0:00:00
Step 3: Apply Filters to Data
Select the date column for filtering:
- Click Filter → Custom Filter
- Set: Greater than or equal to →
RangeStart - Set: Less than →
RangeEnd - Click Close & Apply

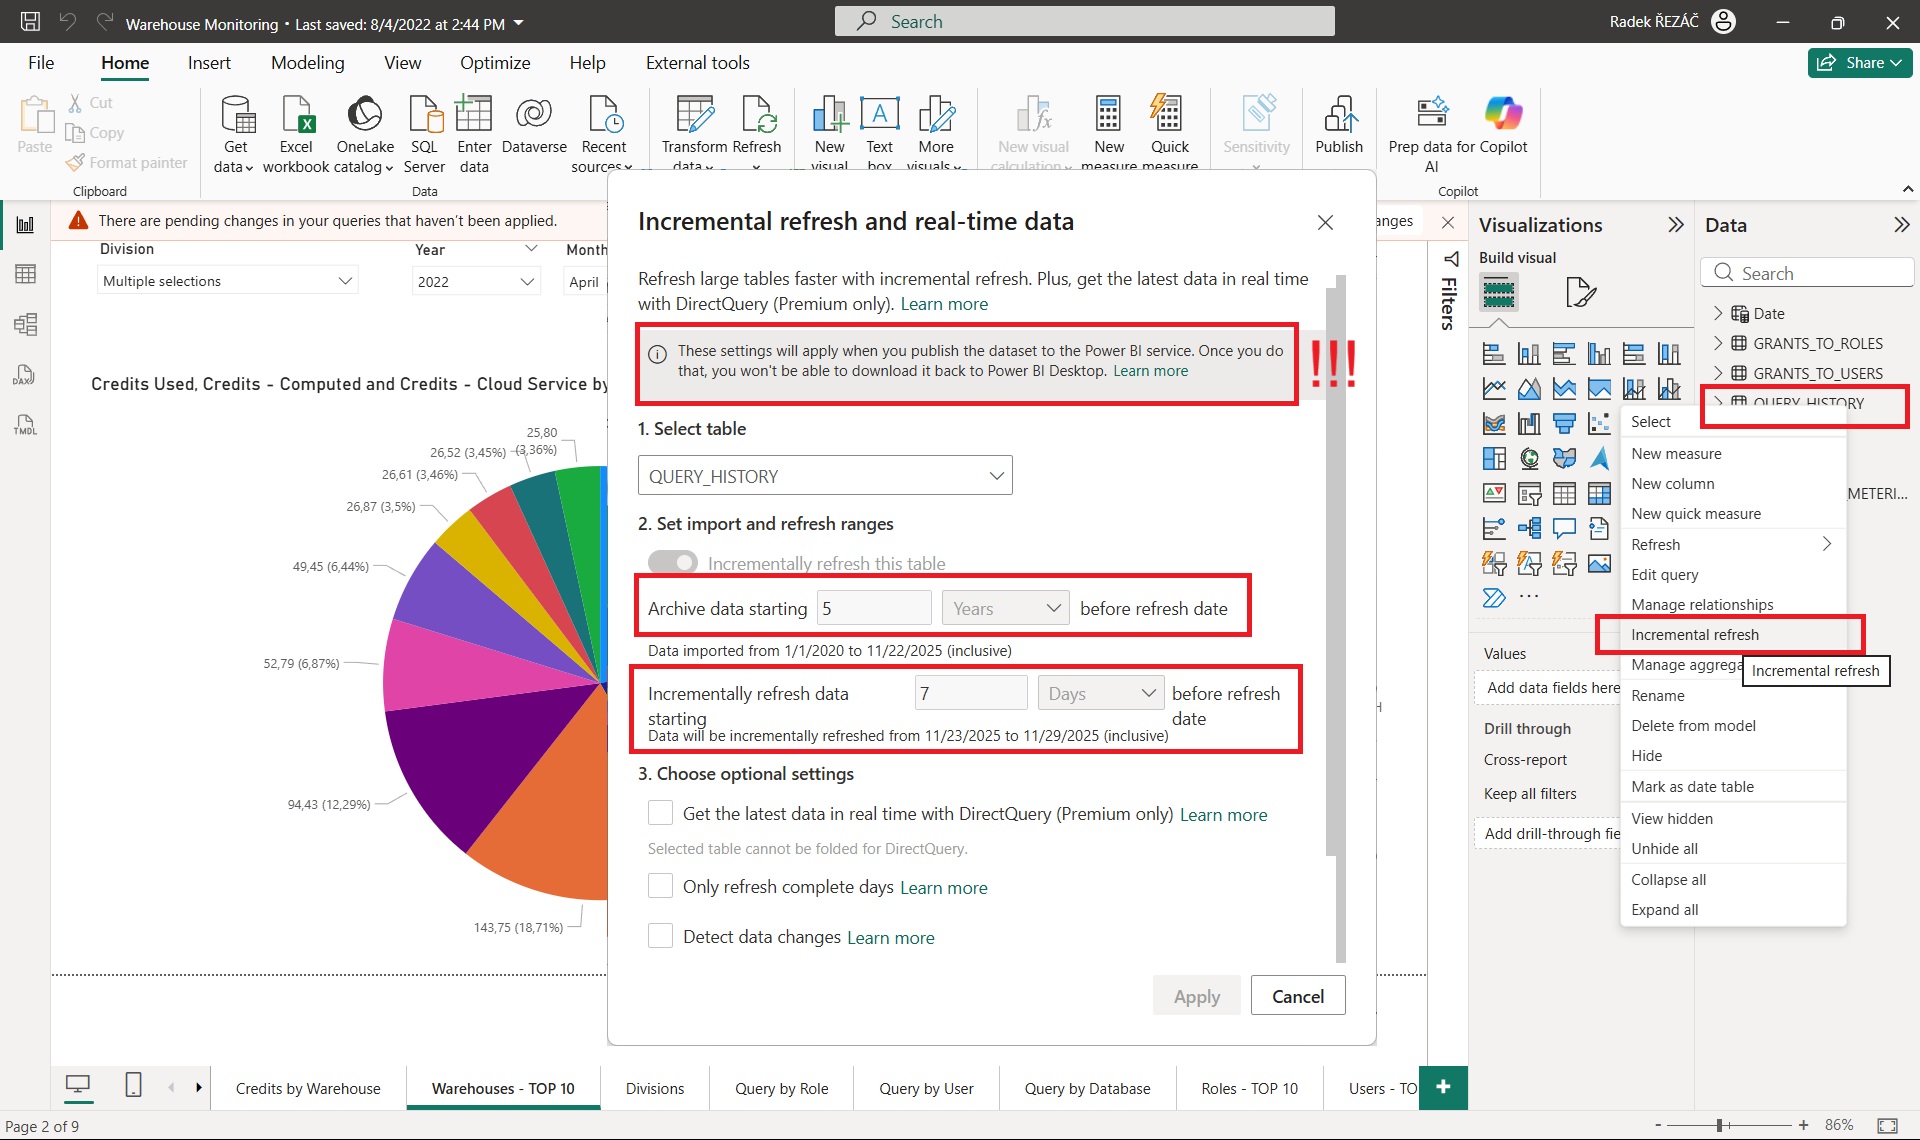
Step 4: Enable Incremental Refresh
Right-click the table in Power BI Desktop → Incremental Refresh:
- Store data for: e.g., 5 years (the full historical range to retain)
- Refresh data for: e.g., last 1 month (the rolling window to refresh each time)
- Click Apply
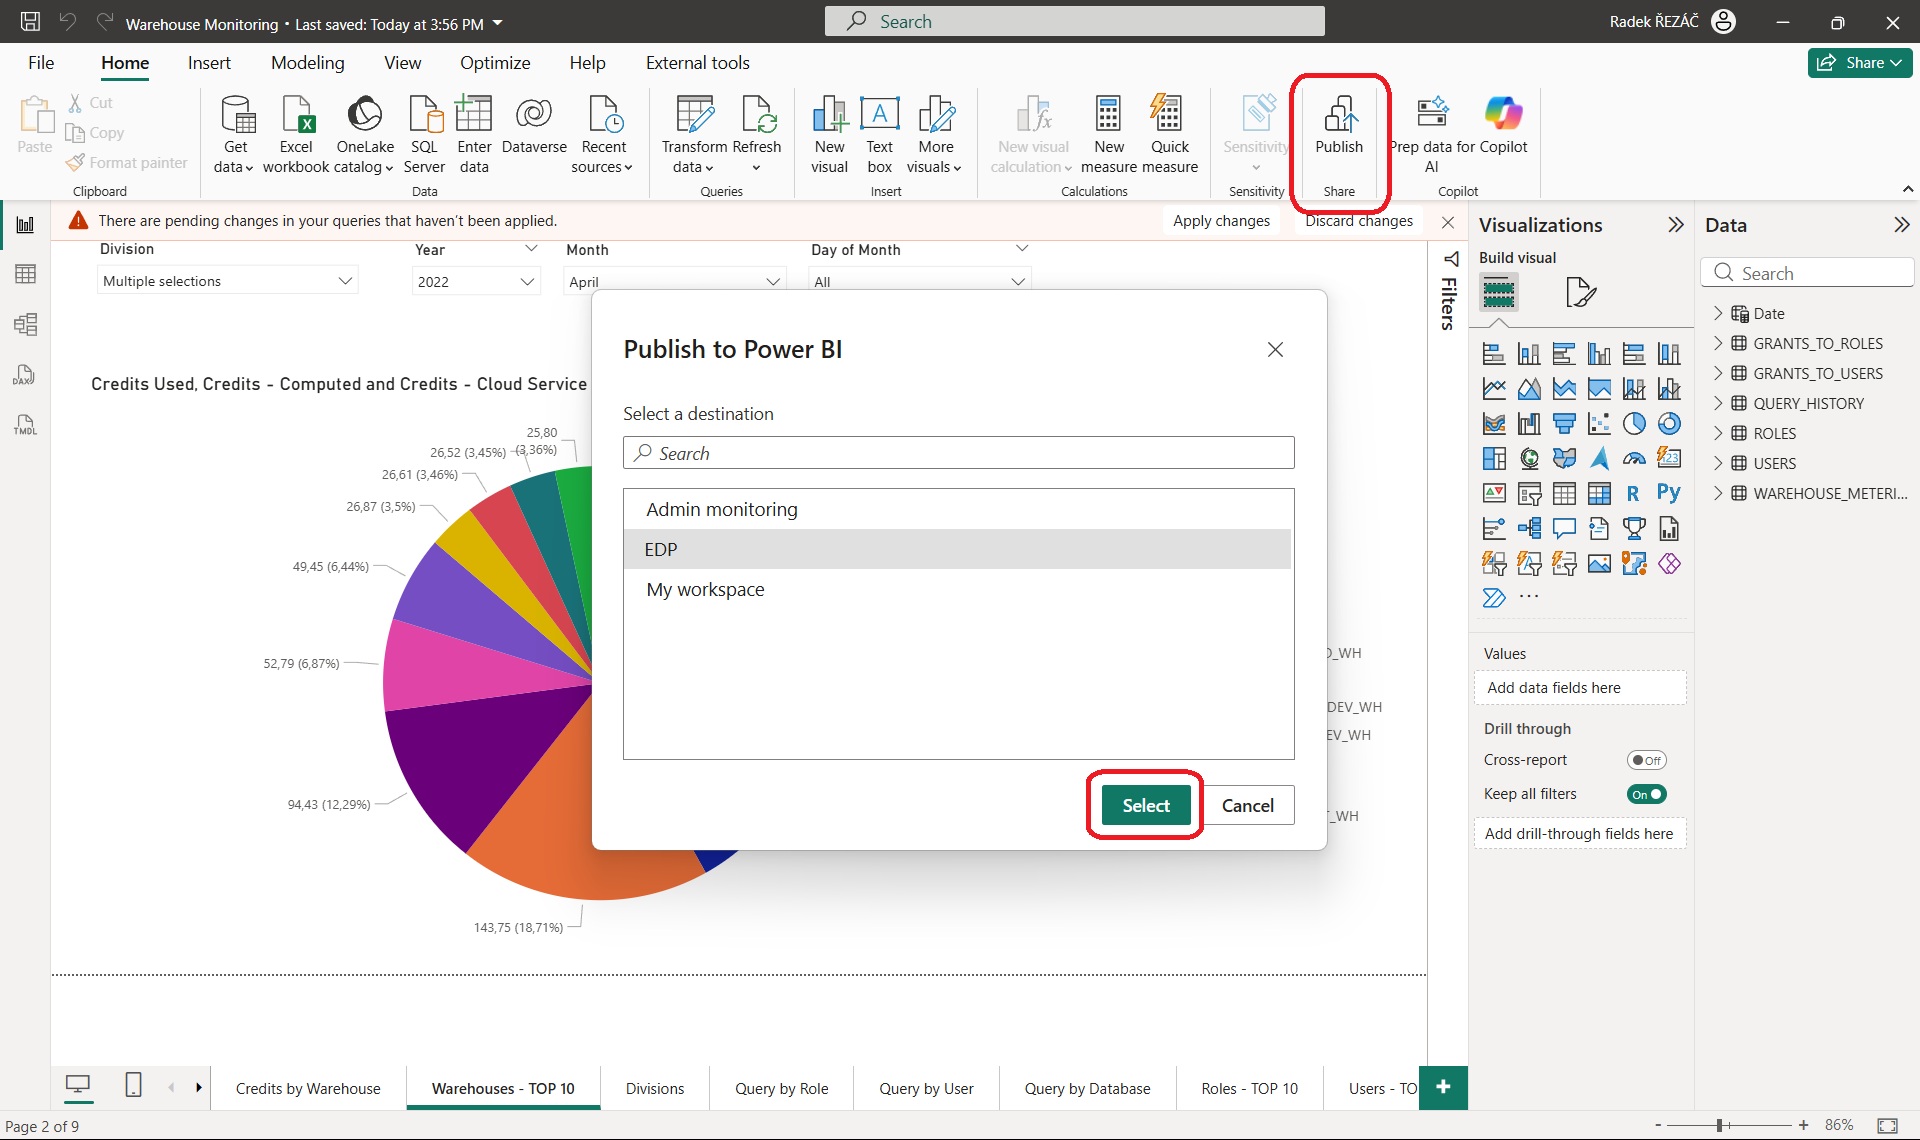
Step 5: Publish to Power BI Service
Click Publish to upload the report to Power BI Service. The first publish loads all data within the defined range. In Power BI Service, go to Dataset Settings → Scheduled Refresh to configure the refresh schedule.
Step 6: Test and Verify
Execute a manual refresh and review the refresh logs to confirm that only recent data was updated.
Limitations
- License Requirements — Incremental Refresh in Dataflows is available only in Power BI Premium, Premium Per User (PPU), or Fabric capacities. Pro users are excluded.
- Date/Time Column Required — the feature requires a Date/Time column for partitioning. Datasets without one need preliminary transformations.
- Deleted Records — only new or modified records are processed. Deletes require custom logic or a soft-delete pattern.
- Data Source Compatibility — typically works with SQL databases and Azure sources. API-based direct query sources may not be compatible.
When to Use It
Incremental refresh makes the biggest difference when:
- Your dataset grows continuously over time (transactional data, event logs)
- Full refreshes are taking longer than your refresh window allows
- You have Premium or Fabric capacity (Pro has limited support)
- Your data source supports query folding (the filter is pushed down to the source)
For smaller datasets or sources that don't support query folding, full refresh is often simpler and more reliable.
Power BI DAX Masterclass
Best practices and key patterns for Power BI DAX: calculated columns vs. measures, date tables, iterator functions, CALCULATE, time intelligence, and more.
Set Power BI Row-Level Security to SAP Cost Center
How to implement dynamic Row-Level Security (RLS) in Power BI using SAP authorization tables — restricting data access by cost center based on the logged-in user.